Ford Ecosport: Exterior Trim and Ornamentation / Removal and Installation - A-Pillar Moulding
Ford Ecosport 2014-2025 Service and Repair Manual / Body and Paint / Exterior Trim and Ornamentation / Removal and Installation - A-Pillar Moulding
Removal
NOTE: Removal steps in this procedure may contain installation details.
NOTE: LH side shown, RH side similar.
-
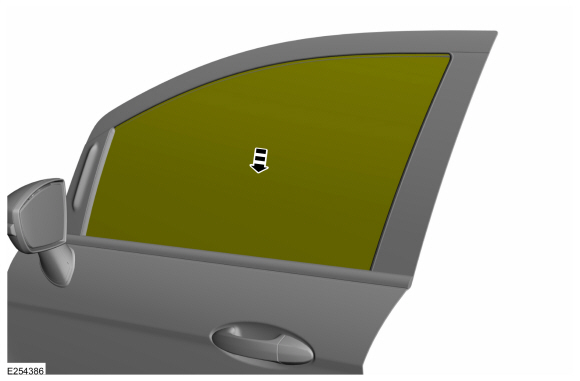
Lower the door window glass.
 |
-
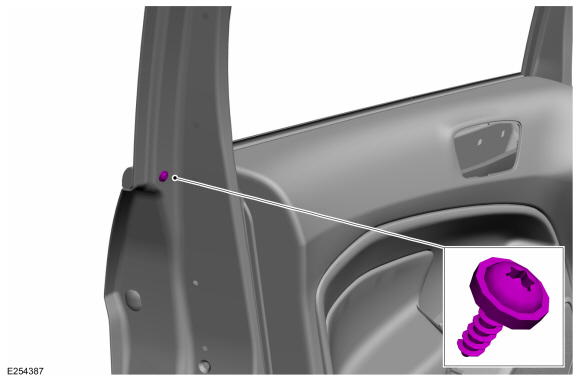
Remove the upper belt moulding screw at rear of the door.
 |
-
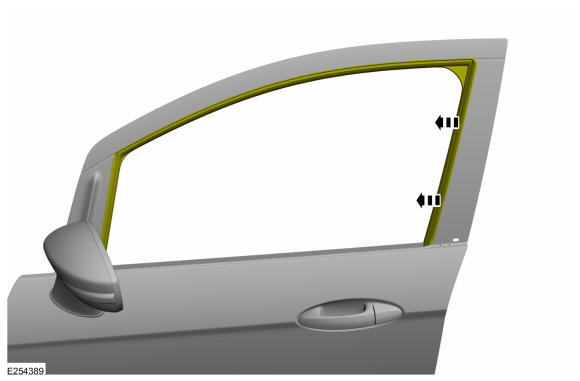
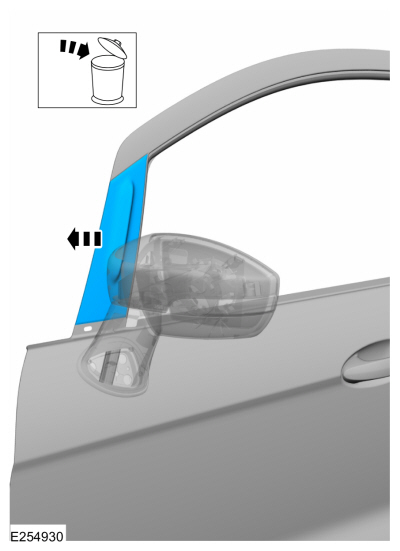
Using a non-marring trim tool, disengage the moulding from the channel in the door and remove the moulding.
 |
-
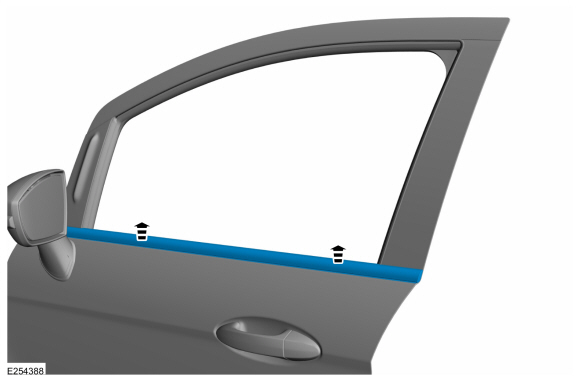
Position aside the glass run weatherstrip.
 |
-
Remove and discard the A-pillar moulding.
 |
Installation
-
NOTE: Make sure that a new component is installed.
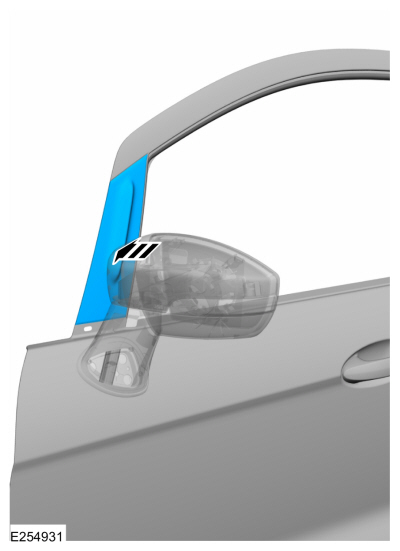
Install the A-pillar moulding.
 |
-
To install, reverse the removal procedure.
 General Procedures - Finish Panel Repair
Repair
NOTE:
Mouldings located on the front and rear window frames may
experience minor scratches from vehicle shipment or car wash racks. The
imperfections may be repaired instead of replacing components by
following the steps below...
 Removal and Installation - D-Pillar Moulding
Removal
NOTE:
LH side shown, RH side similar.
Carefully open the liftgate.
Remove the D-pillar moulding screws and remove the D-pillar moulding...
Other information:
Ford Ecosport 2014-2025 Service and Repair Manual: General Procedures - Air Conditioning (A/C) Clutch Air Gap Adjustment
Activation NOTE: Compressor with a spring rubber clutch shown others similar. Check the A/C clutch air gap at 3 equally spaced places between the clutch plate and the A/C clutch pulley. Refer to Specifications in Group 412. Remove the A/C clutch...
Ford Ecosport 2014-2025 Service and Repair Manual: General Procedures - Electronic Leak Detection - Vehicles With: R1234YF Refrigerant
Special Tool(s) / General Equipment Electronic Leak Detector Inspection NOTE: Use a Rotunda-approved Electronic Leak Detector for R-1234yf refrigerant SAE Certified to J2913. NOTE: Good ventilation is necessary in the area where electronic A/C leak testing is to be carried out...
Categories
- Manuals Home
- 2nd Gen Ford Ecosport Service Manual (2014 - 2025)
- Body and Paint
- Removal and Installation - Starter Motor
- Removal and Installation - Front Seat
- Removal and Installation - Rear Bumper
- Removal and Installation - Body Control Module (BCM)
Removal and Installation - Front Stabilizer Bar
Special Tool(s) / General Equipment
Tie Rod End Remover Transmission JackRemoval
NOTICE: Suspension fasteners are critical parts that affect the performance of vital components and systems. Failure of these fasteners may result in major service expense. Use the same or equivalent parts if replacement is necessary. Do not use a replacement part of lesser quality or substitute design. Tighten fasteners as specified.
NOTE: Removal steps in this procedure may contain installation details.
NOTICE: Disconnect the b
Copyright © 2025 www.foecosport2.com