Ford Ecosport: Rear Seats / Removal and Installation - Rear Seat Backrest
Removal
 WARNING:
The following procedure describes critical repair steps
required for correct seat component installation. Follow all notes and
steps carefully. Do not place any objects between the seat components
and the body of the vehicle, nor any objects within a joint internal to
the seat structure. Failure to follow step instructions may result in
incorrect operation of the seat components and increases the risk of
serious personal injury.
NOTE:
Removal steps in this procedure may contain installation details.
-
Refer to: Health and Safety Precautions (100-00 General Information, Description and Operation).
-
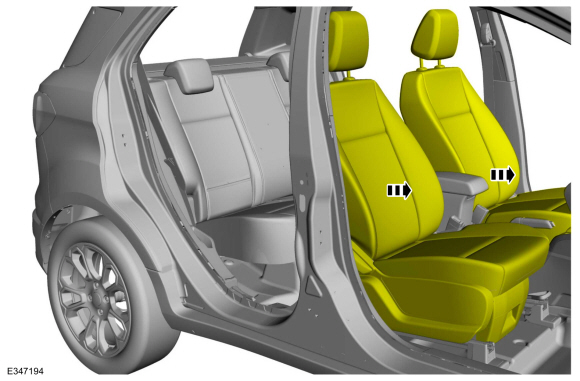
Position both front seats to the full forward position.
-
Depower the SRS .
Refer to: Supplemental Restraint System (SRS) Depowering (501-20B Supplemental Restraint System, General Procedures).
-
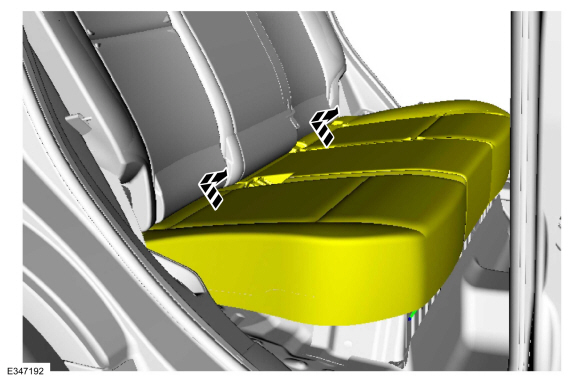
Position both of the rear seat cushions to the full forward position.
40 percent seat
-
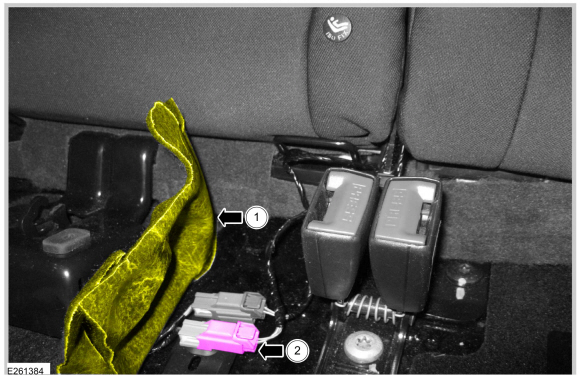
Disconnect the second row seat side airbag electrical connector.
-
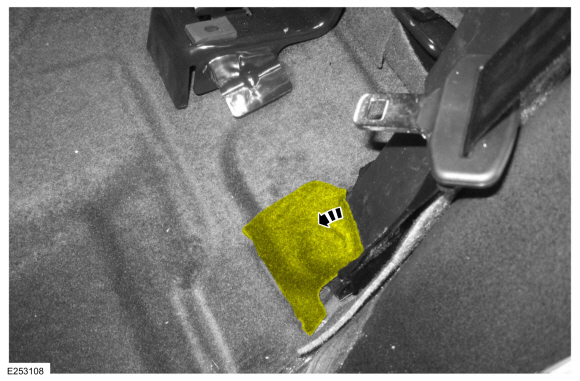
Position the carpet aside.
-
Disconnect the electrical connector.
60 percent backrest
-
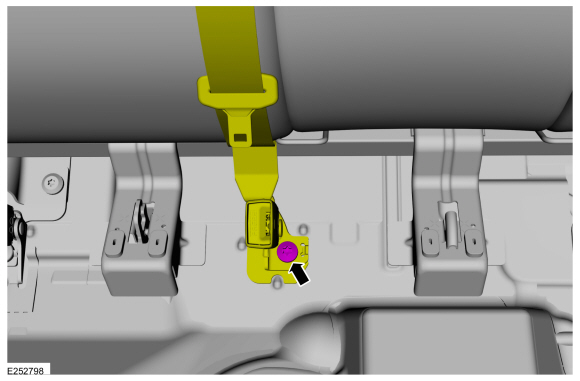
Remove the bolt and position the rear LH seatbelt buckle aside.
Torque:
30 lb.ft (40 Nm)
-
Disconnect the second row seat side airbag electrical connector.
-
Position the carpet aside.
-
Disconnect the electrical connector.
All seats
-
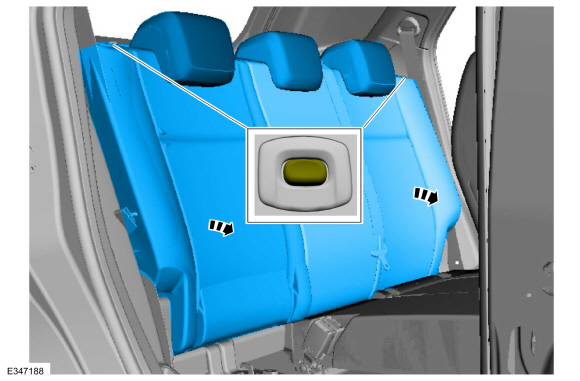
Push the rear seat backrest release buttons and lower both rear seat backrests.
-
Pull the strap and remove the load space floor mat and the load space floor panel.
-
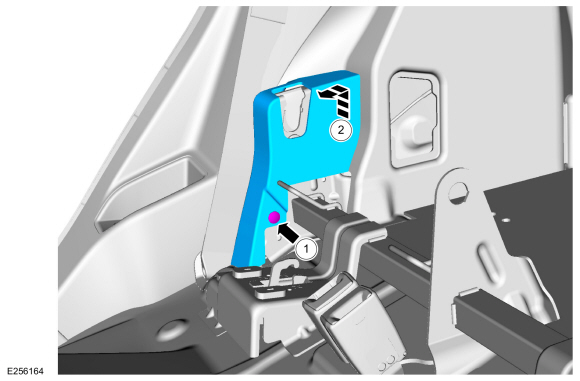
Remove the pin-type retainer and the rear seat backrest riser cover.
-
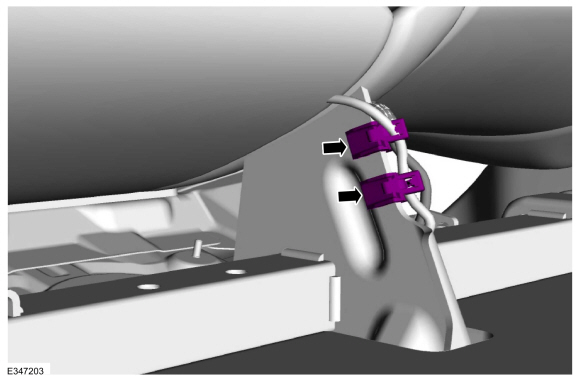
Remove the wire harness retainers.
-
NOTE:
60 percent rear seat backrest shown, 40 percent similar.
-
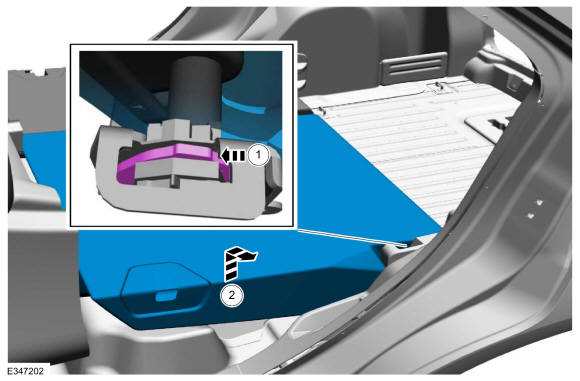
Rotate the backrest hinge locking arm rearward and release the backrest.
-
Remove the rear seat backrest.
Rear seat backrest riser
NOTE:
These steps are only necessary when installing a new component. Both rear seat backrests must be removed.
-
Remove the rear RH and center seatbelt buckle assembly.
Refer to: Rear Seatbelt Buckle RH and Center (501-20A Seatbelt Systems, Removal and Installation).
-
On both sides.
Position the carpet aside to access the seatbelt anchor.
-
On both sides.
Remove the bolt and position the seatbelt anchor aside.
Torque:
30 lb.ft (40 Nm)
-
On both sides.
-
Remove the pin-type retainer.
-
Remove the rear seat riser cover.
-
Remove the rear seat riser.
-
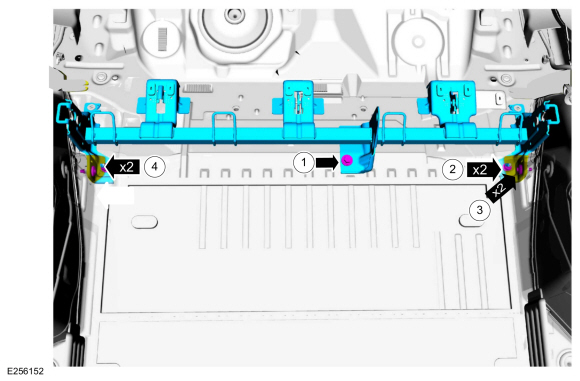
Remove the rear seat riser center bolt.
Torque:
35 lb.ft (47.5 Nm)
-
Remove the rear seat riser nuts.
Torque:
35 lb.ft (47.5 Nm)
-
Remove the rear seat riser outer bolts.
Torque:
30 lb.ft (40 Nm)
-
Remove the rear seat riser studs..
Torque:
30 lb.ft (40 Nm)
Installation
NOTE:
During installation, make sure the seatbelt webbing is not
twisted and the seatbelts and buckles are accessible to the occupants.
-
To install, reverse the removal procedure.
-
Check the seatbelt system for correct operation.
Refer to: Seatbelt Systems (501-20A Seatbelt Systems, Diagnosis and Testing).
-
Repower the SRS .
Refer to: Supplemental Restraint System (SRS) Repowering (501-20B Supplemental Restraint System, General Procedures).
Removal
NOTE:
Removal steps in this procedure may contain installation details.
Refer to: Rear Seat Backrest (501-10B Rear Seats, Removal and Installation)...
Special Tool(s) /
General Equipment
Hog Ring Plier
Removal
NOTE:
60 percent rear seat backrest shown, 40 percent similar.
If equipped...
Other information:
1.5L Duratorq-TDCi shown, All others similar
Item
Description
1
Receiver drier element
2
Condenser
3
A/C compressor outlet line
4
A/C compressor
5
A/C compressor inlet line
6
A/C pressure transducer
7
Condenser outlet line
8
Evaporator inlet and outlet manifold
9
Thermostatic..
Deactivation
NOTE:
During vehicle build, some modules, such as the IPC and BCM are set in factory mode.
Factory mode reduces the drain on the battery during longer periods
where the vehicle is not used. While in the factory mode, various
systems may be altered or disabled and the IPC
displays FACTORY MODE CONTACT DEALER in the message center. If the
vehicle is in factory mo..
 WARNING:
The following procedure describes critical repair steps
required for correct seat component installation. Follow all notes and
steps carefully. Do not place any objects between the seat components
and the body of the vehicle, nor any objects within a joint internal to
the seat structure. Failure to follow step instructions may result in
incorrect operation of the seat components and increases the risk of
serious personal injury.




 Removal and Installation - Rear Seat Armrest
 Removal and Installation - Rear Seat Backrest Cover
