Ford Ecosport: Interior Trim and Ornamentation / Removal and Installation - Headliner
Materials
| Name | Specification |
|---|---|
| 3M™ Super-Fast Repair Adhesive 04747 |
- |
Removal
-
Remove the following items:
-
On both sides.
Remove the A-pillar trim panel.
Refer to: A-Pillar Trim Panel (501-05 Interior Trim and Ornamentation, Removal and Installation).
-
On both sides.
Remove the B-pillar trim panel.
Refer to: B-Pillar Trim Panel (501-05 Interior Trim and Ornamentation, Removal and Installation).
-
On both sides.
Remove the D-pillar trim panel.
Refer to: D-Pillar Trim Panel (501-05 Interior Trim and Ornamentation, Removal and Installation).
-
Remove the overhead console.
Refer to: Overhead Console (501-12 Instrument Panel and Console, Removal and Installation).
-
On both sides.
-
On both sides.
Fully recline the front seat backrest.
 |
-
On RH side.
Disconnect the electrical connectors and position the headliner wiring harness aside.
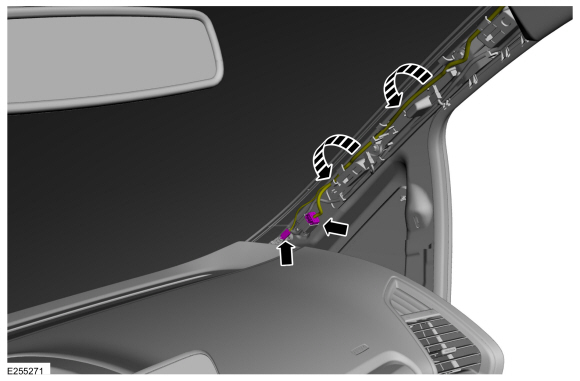 |
-
On LH side.
Disconnect the electrical connector and position the headliner wiring harness aside.
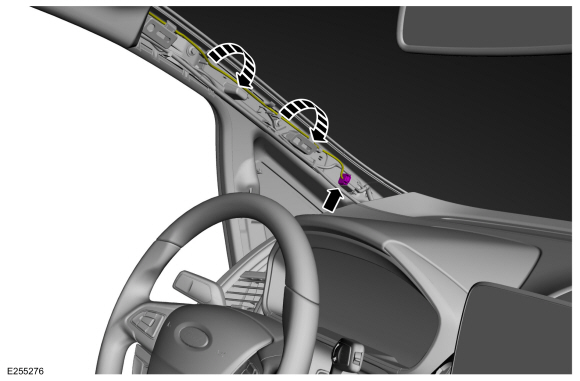 |
-
On LH side.
Disconnect the rear washer hose and position aside.
 |
-
On both sides.
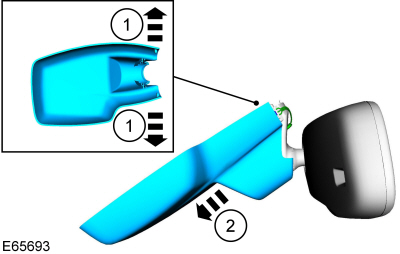
Remove the sunvisor.
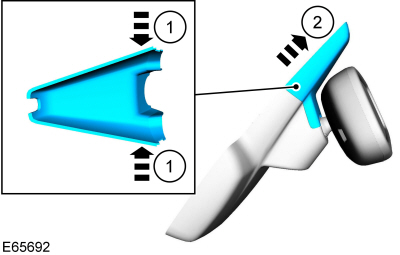
-
Remove the sun visor cover.
-
Remove the screws.
-
Rotate outward to remove the sun visor.
-
Remove the sun visor cover.
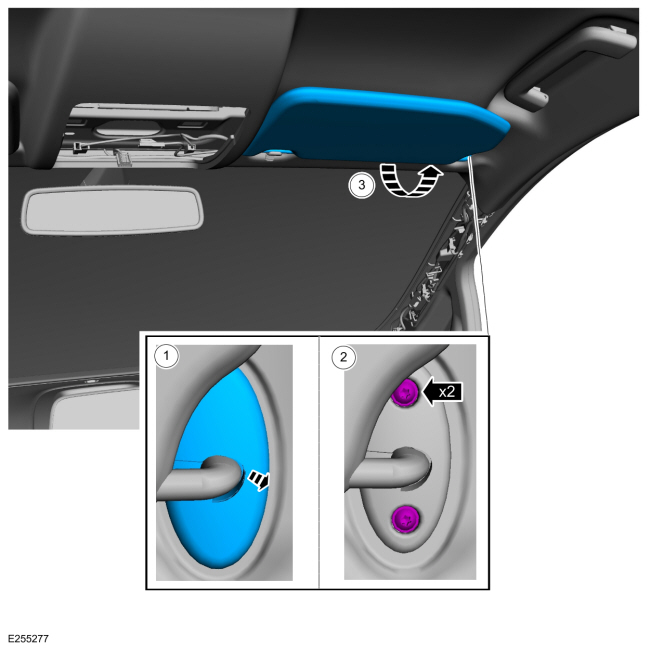 |
-
On both sides.
Remove the sun visor clip.
-
Open up the sun visor clip cover.
-
Remove the screw.
-
Open up the sun visor clip cover.
 |
-
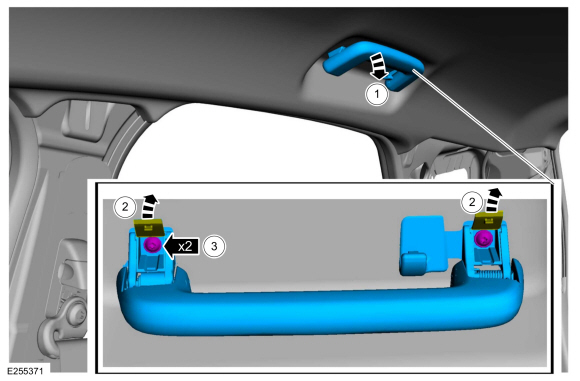
If equipped, on RH side.
Remove the front assist handle.
-
Position the front assist handle down.
-
Open the covers.
-
Remove the screws.
-
Position the front assist handle down.
 |
-
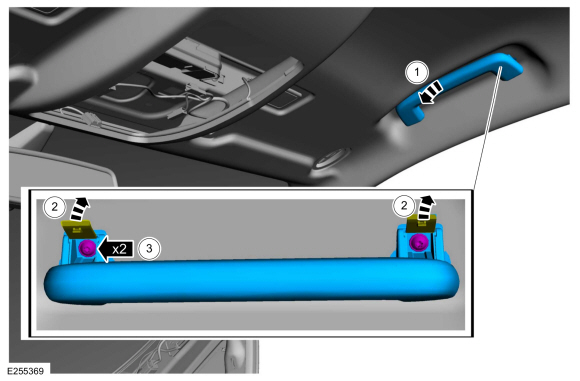
If equipped, on both sides.
Remove the rear assist handle.
-
Position the rear assist handle down.
-
Open the covers.
-
Remove the screws.
-
Position the rear assist handle down.
 |
-
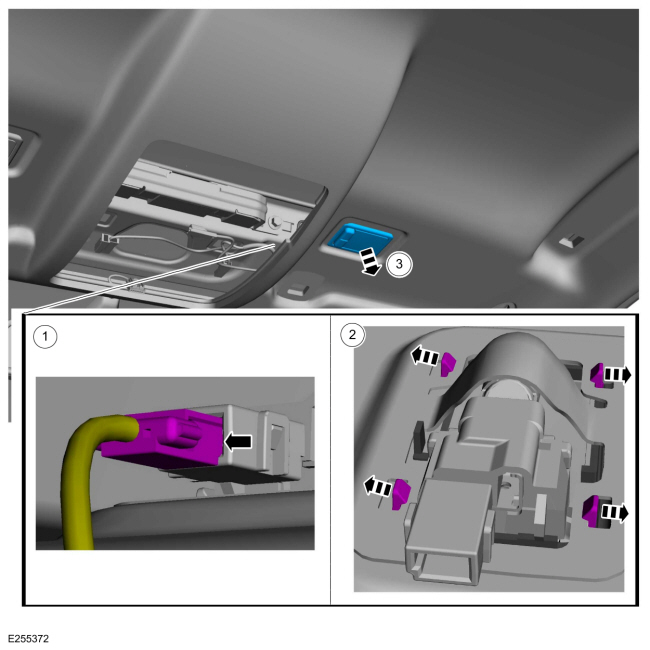
On both sides.
Remove the interior front lamp.
-
Disconnect the electrical connector.
-
Release the tabs.
-
Pull downward to remove.
-
Disconnect the electrical connector.
 |
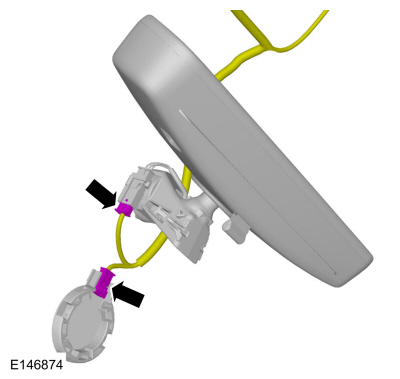
Vehicles with autolamps and rain sensor
-
Remove rear view mirror upper cover.
-
Pressing inward, release the side tabs.
-
Sliding toward the rear of the vehicle to remove.
-
Pressing inward, release the side tabs.
 |
-
Remove the rear view mirror lower cover.
-
Pulling outward, release the side tabs.
-
Sliding toward the front of the vehicle, to remove.
-
Pulling outward, release the side tabs.
 |
-
Disconnect the rain senor and rear view mirror electrical connectors.
 |
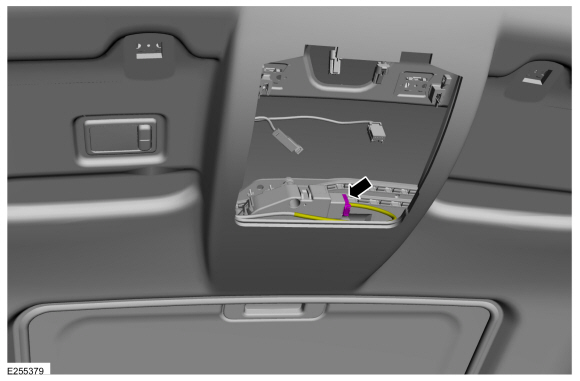
Vehicles with roof opening panel
-
Disconnect the roof opening panel motor electrical connector.
 |
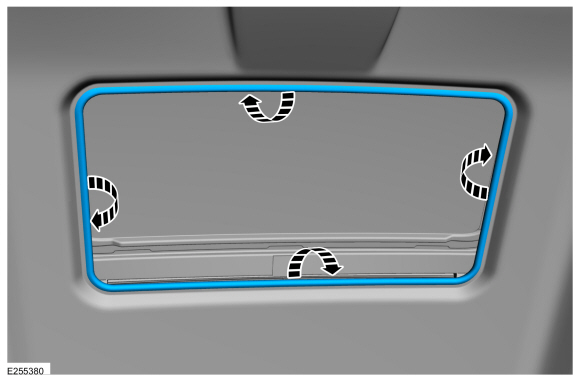
-
Remove the roof opening panel trim ring.
 |
All vehicles
-
On LH side.
Remove the loadspace trim panel.
Refer to: Loadspace Trim Panel (501-05 Interior Trim and Ornamentation, Removal and Installation).
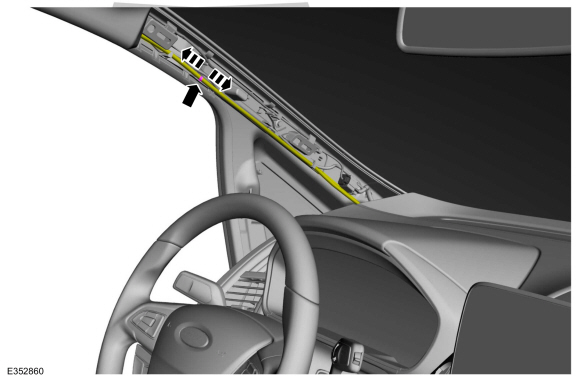
-
On LH side.
Disconnect the rear washer hose and release hose from the clips.
 |
-
On both sides.
Position the front and rear door weatherstrip aside.
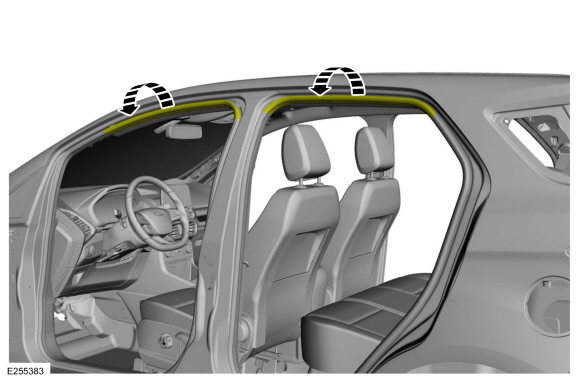 |
-
Position the liftgate weatherstrip aside.
 |
-
Release the rear clips and lower the headliner.
 |
-
Remove the headliner.
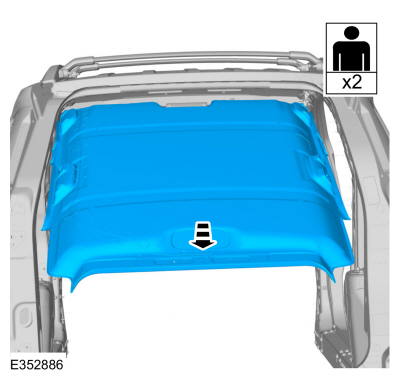 |
Installation
-
NOTE: These steps are only necessary when installing a new component.
NOTE: When transferring the headliner harness to a new headliner note the location of each electrical connector during removal and maintain those locations when transferring the harness. If equipped with noise cancellation the microphone connectors are the same but are not interchangeable and must maintain their original locations for the system to operate correctly.
NOTE: Obtain the specified adhesive commercially. Depending on the headliner and optional wiring harness(es), the purchase of multiple tubes is suggested.
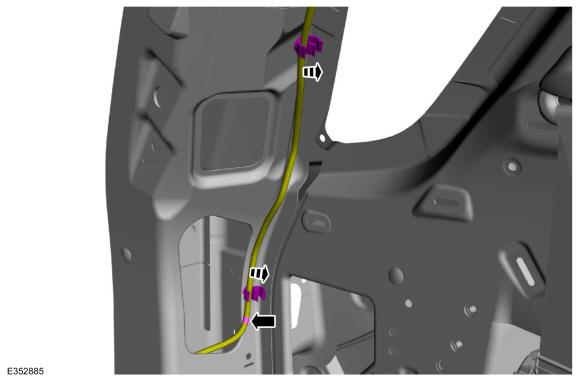
-
Using tape, mark the wire at the exit points for proper length from headliner-to-body / roof connectors.
-
Carefully remove the wiring harness from the original headliner.
-
Using a marking tool, mark the new headliner with
the routing and exit points of the wiring harness from the original
headliner.
-
NOTICE: Make sure not to damage the wiring harness when cutting the excess adhesive from the wiring harness.
Cut and remove any excess adhesive from the wiring harness.
-
Position the wiring harness onto the new headliner,
making sure the harness has enough length to be connected to the body /
roof connectors at the tape location(s) applied earlier. Apply tape to
temporarily hold the wiring harness in position on the headliner.
-
Apply the adhesive in the same location as the
factory installed adhesive along the full length of the wiring
harness-to-headliner to avoid any NVH concern(s).
Material: 3M™ Super-Fast Repair Adhesive / 04747
-
Using tape, mark the wire at the exit points for proper length from headliner-to-body / roof connectors.
-
NOTE: Transfer parts as necessary.
To install, reverse the removal procedure.
 Removal and Installation - Front Door Trim Panel
Special Tool(s) /
General Equipment
Interior Trim Remover
Removal
NOTE:
LH shown, RH similar.
Remove the front interior door handle screw cover...
 Removal and Installation - Headliner - Lowering
Remove the following items:
On both sides.
Remove the A-pillar trim panel.
Refer to: A-Pillar Trim Panel (501-05 Interior Trim and Ornamentation, Removal and Installation)...
Other information:
Ford Ecosport 2014-2025 Service and Repair Manual: Removal and Installation - Front Head Restraint Guide Sleeve
Special Tool(s) / General Equipment Flat Headed Screw Driver Removal NOTE: Typical head restraint guide sleeve shown, others similar. Depress the locking tabs and remove the head restraint. Remove the headrest restraint guide sleeves...
Ford Ecosport 2014-2025 Service and Repair Manual: Specifications
Reference Value Symptom Chart NOTE: The Reference Value Symptom Chart provides guidance in selecting the appropriate parameter identification (PID) or measured signal related to the fault area. Select a symptom from the symptom chart along with the category number and go to the PID/Measured Signal Chart...
Categories
- Manuals Home
- 2nd Gen Ford Ecosport Service Manual (2014 - 2025)
- Description and Operation - Jacking and Lifting - Overview
- Removal and Installation - Block Heater
- Removal and Installation - Evaporative Emission Canister Purge Valve
- Engine
- Removal and Installation - Front Seat
Removal and Installation - Wheel Knuckle Bushing
Special Tool(s) / General Equipment
Hydraulic PressRemoval
NOTE: Removal steps in this procedure may contain installation details.
Remove the wheel knuckle.Refer to: Wheel Knuckle - Vehicles With: Rear Drum Brakes (204-02B Rear Suspension - AWD, Removal and Installation).
Remove the rear toe adjustment retainers and remove the wheel knuckle mounting bracket.
Torque:
Stage 1: 177 lb.in (20 Nm)
Stage 2: 76 lb.ft (103 Nm)